Drivers today want more range. Electric cars must go farther, charge faster, and stay efficient. The Benz EQB 260meets that demand with smart design and real-world value.
How Far Can It Go?
The EQB 260, a compact luxury SUV, offers up to 440 kilometers per full charge. This range fits daily use and weekend trips. Mercedes uses an advanced 66.5 kWh battery, boosting performance and distance.
Model
Battery Size
WLTP Range
Benz EQB 260
66.5 kWh
Up to 440 km
EQB 350
66.5 kWh
Up to 419 km
The EQB 260 focuses on efficiency. It powers a front-wheel drive motor. This setup saves energy and supports smoother driving.
Real Benefits on the Road
Drivers of the benz eqb 260 report steady performance in cities and on highways. Charging is flexible. A fast DC charger powers the battery from 10% to 80% in about 30 minutes.
Its body is aerodynamic. Its software manages power smartly. These features work together to extend its range.
Final Words
So, how far can a fully electric Mercedes go? In the case of the EQB 260, the answer is: far enough for real life. With comfort, space, and strong range, this model redefines electric driving.
https://artistogel.top/wp-content/uploads/2020/03/logo2.png00adminhttps://artistogel.top/wp-content/uploads/2020/03/logo2.pngadmin2025-06-26 16:43:222025-06-26 16:43:22What is the range of the Mercedes fully electric?
Aerosol cans are commonly used for various household and industrial purposes, from air fresheners to cleaning agents. However, many people may not be aware of the dangers these cans pose if exposed to extreme heat or fire. Placing an aerosol can in a fire is extremely hazardous and can lead to serious consequences. In this article, we will explore the dangers of heat exposure to aerosol cans and why it’s crucial to handle them with care.
The Risk of Explosion
When an aerosol can is exposed to high temperatures, the pressure inside the can increases rapidly. Aerosol cans are sealed containers, and when heated, the contents turn into gas, creating pressure that the can may not be able to withstand. Eventually, this pressure may cause the can to explode, releasing its contents in a violent burst. This can result in severe injuries, fires, or even fatalities.
Temperature
Pressure Impact
Risk
100°F (38°C)
Mild increase
No immediate risk
150°F (66°C)
Moderate increase
Potential for rupture
200°F (93°C)
High increase
Risk of explosion
How to Avoid Dangerous Situations
Understanding how to safely store and handle aerosol cans is crucial. Always keep them away from heat sources, including fires, stoves, or direct sunlight. If you are looking for an aerosol can supplier, make sure they provide clear guidelines on the safe storage and use of their products. Ensuring that the cans are properly labeled with hazard warnings is also essential for preventing accidents.
The Role of Pressure Relief Valves
Some aerosol cans are designed with safety features, such as pressure relief valves, to reduce the risk of explosion under high heat. These features allow gas to escape if the pressure becomes too high, potentially preventing the can from bursting. However, relying on this safety mechanism alone is not enough. Proper care should always be taken to avoid exposing the cans to excessive heat.
Conclusion
In summary, placing an aerosol can in a fire can be extremely dangerous, leading to the risk of explosion and serious harm. Always store these cans in cool, dry places, and never expose them to fire. If you are unsure about the safety precautions of a product, consult your aerosol can supplier for detailed guidelines. By following these simple safety measures, you can avoid accidents and use aerosol products more safely.
https://artistogel.top/wp-content/uploads/2020/03/logo2.png00adminhttps://artistogel.top/wp-content/uploads/2020/03/logo2.pngadmin2025-06-26 09:31:402025-06-26 09:31:40What happens if an aerosol can is placed in a fire?
Si notas alguna de estas señales, es hora de actuar:
Manchas que no salen
Olor constante
Superficie desgastada
Alergias frecuentes
Los suelos de madera evitan estos problemas y son fáciles de mantener.
Ventajas del cambio
Pasar de alfombra a madera trae múltiples beneficios. Mira esta comparación:
Característica
Alfombra
Suelo de madera
Limpieza
Difícil
Muy fácil
Vida útil
5–8 años
Más de 15 años
Estilo
Limitado
Versátil y moderno
Alergias
Alta probabilidad
Hipoalergénico
Muchos clientes eligen ikea suelos de maderapor su relación precio-calidad, instalación rápida y acabados elegantes.
¿Cuándo hacer el cambio?
Al renovar tu casa
Si tienes mascotas o niños
Antes del invierno
Al notar humedad en la alfombra
La instalación de suelo laminado es rápida y sin complicaciones.
Conclusión
El mejor momento para sustituir tu alfombra es cuando ya no aporta comodidad ni estética. Apostar por ikea suelos de madera es dar un paso hacia un hogar más limpio, moderno y duradero.
https://artistogel.top/wp-content/uploads/2020/03/logo2.png00adminhttps://artistogel.top/wp-content/uploads/2020/03/logo2.pngadmin2025-06-24 14:53:522025-06-24 14:53:52¿Cuál es el momento ideal para sustituir la alfombra por suelo de madera?
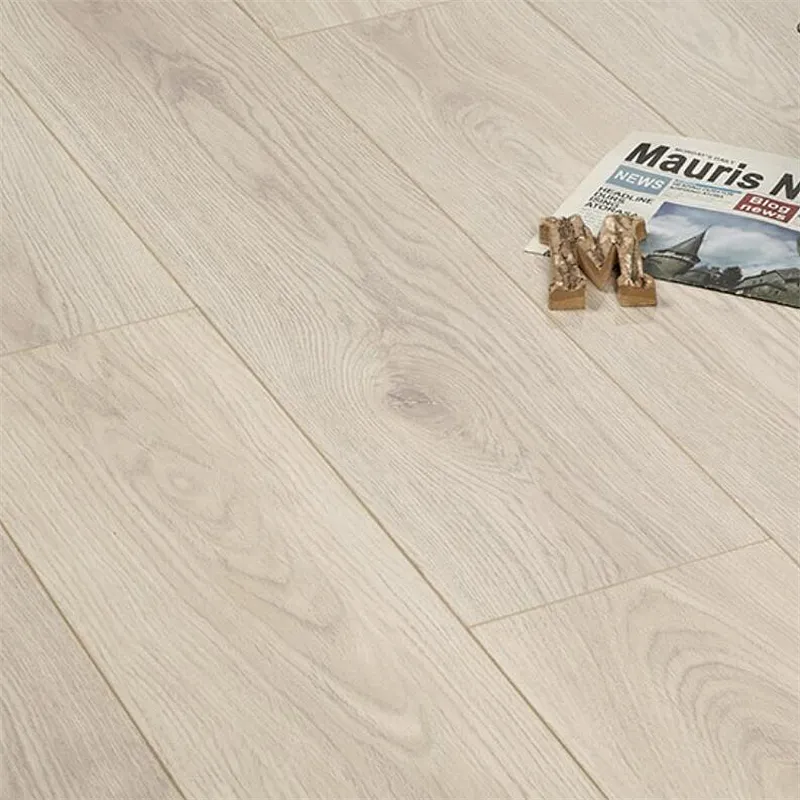
Laminate floors use a click-lock system. This makes setup fast and tool-free. You don’t need glue or nails. Many DIY lovers choose cheap laminate flooringfor this reason.
Stylish and Versatile
Laminate comes in wood, stone, and tile looks. Advanced printing gives realistic textures. You can match any room’s style — rustic, modern, or classic.
Laminate resists wear from foot traffic and pets. The tough top layer guards against stains and scratches. It’s ideal for busy homes and offices.
Water Resistance Options
Not all laminate is waterproof, but top brands now offer it. Waterproof laminate floor can handle kitchen spills, bathroom moisture, and damp basements.
This means you don’t sacrifice looks for function.
Easy to Clean
Cleaning is simple. Just sweep and mop with a damp cloth. No need for wax or polish. That saves time and money.
Budget-Friendly
Compared to hardwood or tile, laminate is affordable. Many users choose cheap laminate flooring to stay within budget without losing quality.
Here’s a quick comparison:
Feature
Laminate Floor
Cost
Low
Water Resistance
Available in options
Installation
DIY-friendly
Appearance
Wood-like textures
Maintenance
Low effort
Eco-Conscious Choice
Many laminate floors use recycled materials. Some even have certifications for air quality and sustainability.
Final Thoughts
Laminate flooring offers beauty, strength, and value. Whether you’re seeking cheap laminate flooring for a quick update or a waterproof laminate floor for tough spaces, there’s a perfect match waiting.
https://artistogel.top/wp-content/uploads/2020/03/logo2.png00adminhttps://artistogel.top/wp-content/uploads/2020/03/logo2.pngadmin2025-06-24 14:49:132025-06-24 14:49:13What are the benefits of laminate flooring?
Fermented Yellow Bean Paste: Primarily made from soybeans, often smoother in texture, and slightly milder in flavor.
Fermented Broad Bean Paste: Uses broad beans (fava beans) instead of soybeans, offering a stronger, spicier taste. Popular in Sichuan cuisine.
Chinese Fermented Bean Paste: A general term that may refer to a variety of fermented pastes, including miso-like options or thicker, chunkier versions.
Add a spoonful to vegetable or meat stir-fries to elevate their flavor profile.
Pairs exceptionally well with dishes like eggplant, green beans, or tofu.
2. As a Base for Sauces
Mix with garlic, ginger, and soy sauce for a rich, umami-packed sauce.
Ideal for noodle dishes or dipping sauces.
3. Enhancing Braised Dishes
Use it in stews and braises for an added layer of complexity.
Works beautifully in dishes like braised pork belly or braised fish.
4. In Marinades
Combine with spices, sugar, and oil for a robust marinade.
Particularly good for grilling or roasting meats.
5. Making Spicy Sichuan Dishes
The fermented broad bean paste variant is a key ingredient in dishes like Mapo Tofu and Dan Dan Noodles.
Tips for Cooking with Fermented Yellow Bean Paste
Start Small: Its strong flavor means a little goes a long way. Begin with a teaspoon and adjust to taste.
Balance Flavors: Combine it with sweet or acidic elements (like sugar or vinegar) to balance its saltiness.
Store Properly: Keep it in an airtight container in the refrigerator to maintain its freshness and flavor.
Why You Should Try It
Fermented yellow bean paste is not just a seasoning; it’s a gateway to authentic Chinese cuisine. Whether you’re recreating a classic recipe or experimenting with fusion dishes, its rich umami flavor will undoubtedly enhance your cooking. With Chinese fermented bean paste or fermented broad bean paste, you can bring a touch of Chinese culinary tradition to your kitchen.
https://artistogel.top/wp-content/uploads/2020/03/logo2.png00adminhttps://artistogel.top/wp-content/uploads/2020/03/logo2.pngadmin2025-06-24 14:17:152025-06-24 14:17:15How Is It Different From Other Chinese Pastes?
Colocar un suelo laminado puede transformar por completo una vivienda. Muchos se preguntan cuánto tarda un instalador profesional en completar esta tarea. La respuesta depende de varios factores, pero un buen equipo puede hacerlo en poco tiempo.
Factores que influyen en la instalación
No todos los espacios son iguales. El tiempo de instalación depende del tamaño del área, el estado del subsuelo y la experiencia del instalador.
Un instalador con experiencia puede colocar entre 20 y 40 m² al día. Si el espacio está despejado y el suelo bien nivelado, el trabajo avanza sin pausas.
Por ejemplo, instalar 60 m² podría tomar entre uno y dos días. Esto incluye cortar, encajar y revisar cada pieza.
Preparación antes de instalar
La preparación previa también consume tiempo. El profesional debe revisar la base, limpiar bien y colocar una manta aislante. Si todo está listo al llegar, la instalación va más fluida.
Elegir un producto como el piso laminado Tekno Step permite ahorrar tiempo gracias a su diseño pensado para montaje rápido.
¿Vale la pena contratar un profesional?
Sí, en la mayoría de los casos. Aunque instalar tarima no es complicado, la precisión marca la diferencia. Un profesional evita errores, desperdicio de material y retrabajos.
Además, en cocinas o salones grandes, el piso laminado Tekno Step requiere una instalación uniforme para que luzca perfecto.
Conclusión
Un profesional puede instalar suelo laminado en pocas horas si las condiciones son adecuadas. Con materiales modernos como el piso laminado Tekno Step, el trabajo se hace más rápido y limpio. Así, puedes disfrutar tu nuevo suelo en uno o dos días, sin complicaciones.
https://artistogel.top/wp-content/uploads/2020/03/logo2.png00adminhttps://artistogel.top/wp-content/uploads/2020/03/logo2.pngadmin2025-06-19 10:22:082025-06-19 10:22:08¿Cuánto tiempo tarda un profesional en colocar un suelo laminado?
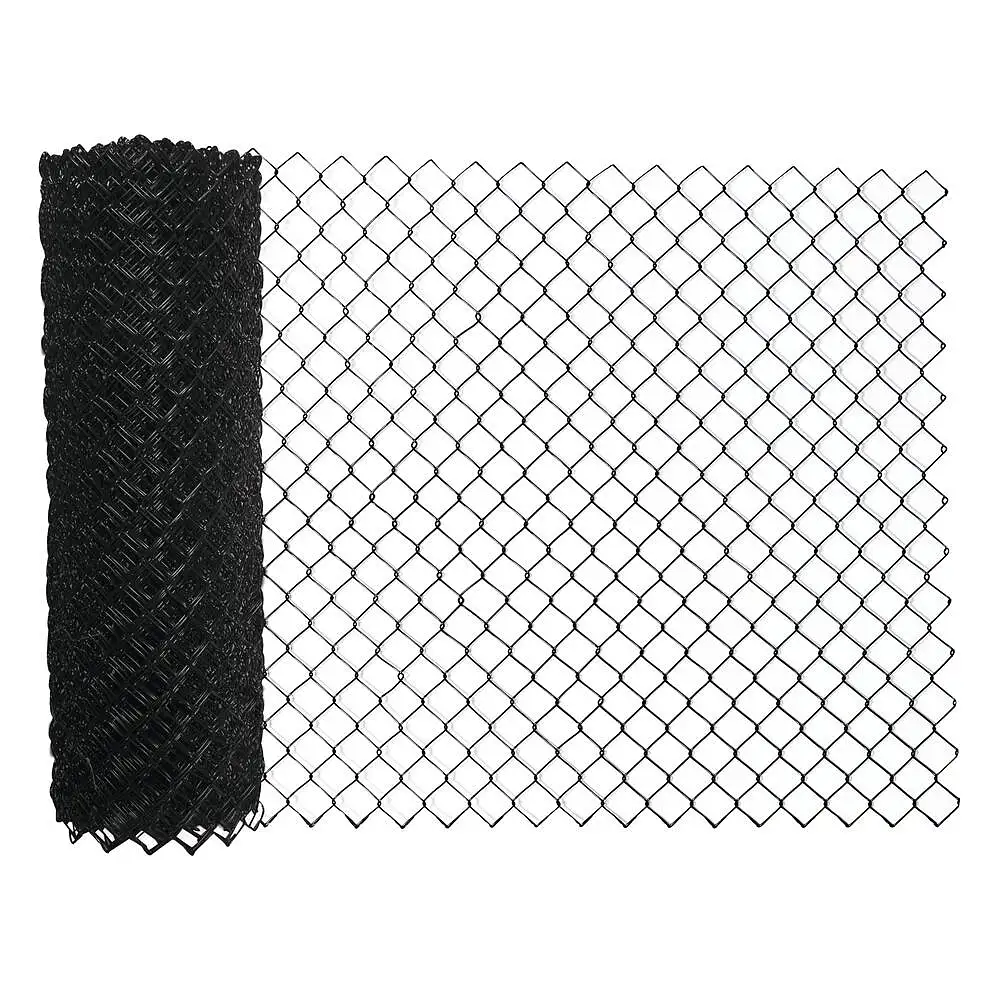
Welded mesh fencing is strong and simple. It’s widely used for homes, farms, and sports areas. Proper installation ensures long life and great stability. Here’s how to install it the right way.
Prepare the Site
Start by marking the fence line. Clear rocks and debris. Use string to guide your path. This helps keep your diamond mesh fencing straight.
Set Strong Fence Posts
Dig holes for posts. Keep them 2 meters apart. Make holes 50 cm deep. Use concrete to fix the posts. Let it dry for 24 hours before continuing.
Step
Tool Needed
Notes
Mark fence line
Chalk, string
Keep it tight and level
Dig post holes
Post digger
50 cm deep minimum
Fix posts
Concrete mix
Let dry fully before use
Attach the Mesh Panel
Unroll the mesh and stretch it. Start from one end post. Use wire ties or tension clips. Keep it tight. Secure to every post. Align it with the top edge.
Tighten and Adjust
Use a fence tensioner if needed. It helps make the diamond mesh fencing firm and straight. Hammer in all ties. Trim the extra wire.
Add Finishing Touches
Check for sharp edges. Cover them with caps or tape. Make sure the fence is level. Walk along the full line. Fix any loose points.
Tips for Long-Lasting Results
Use PVC-coated mesh to prevent rust. Avoid installing in wet weather. Always use gloves and safety gear.
Conclusion
Installing welded mesh fencing is easy with the right tools. A tight layout, solid posts, and firm ties are key. Whether you use basic welded panels or diamond mesh fencing, a clean install brings lasting strength and neat looks.
https://artistogel.top/wp-content/uploads/2020/03/logo2.png00adminhttps://artistogel.top/wp-content/uploads/2020/03/logo2.pngadmin2025-06-18 14:29:102025-06-18 14:29:10How to install welded mesh fencing?
Non woven fusible fabric is a versatile material. It adds structure and strength to fabric items. Many people use it for crafts, bags, and garment reinforcement. But how do you apply it properly? Follow this guide for clear, simple steps.
Understanding Fusible Non Woven Fabric
Fusible fabric has adhesive on one side. When heated, it sticks to another fabric. It works well for bag linings, collars, and more. It’s also a popular choice in the non woven fabric bag industry for strengthening sides and bottoms.
Step-by-Step Application Process
Use the table below for a quick overview of the process:
Step
Action
Tips
1
Cut to shape
Match size to the base fabric
2
Place adhesive side down
Shiny side faces fabric
3
Cover with a damp cloth
Prevents burning
4
Press with hot iron
Use firm pressure for 10-15 seconds
5
Let it cool
Allows adhesive to set
Key Tips for Best Results
Use moderate heat. High heat can melt non woven fibers.
Avoid steam. Moisture weakens the adhesive.
Test on scrap fabric. Check how it bonds before full use.
When creating a non woven fabric bag, apply fusible fabric to panels before stitching. This ensures a clean look and strong hold.
Applications in Bag Making
Fusible non woven fabric helps non woven fabric bag makers shape their products. It stiffens the base, supports sidewalls, and maintains form during use. This material works especially well for bucket-style bags, where structure is essential.
It’s commonly used with polypropylene and spunbond materials. Its lightweight nature doesn’t affect the final bag weight.
Conclusion
Applying non woven fusible fabric is simple and effective. With proper heat and positioning, you can easily reinforce fabrics for sewing projects. Whether you’re crafting garments or making a non woven fabric bag, this method ensures strength and durability. Always follow the steps carefully to get professional results.
https://artistogel.top/wp-content/uploads/2020/03/logo2.png00adminhttps://artistogel.top/wp-content/uploads/2020/03/logo2.pngadmin2025-06-17 16:41:462025-06-17 16:41:46How to apply Non Woven Fusible Fabric?
The short answer is yes, but only if purchased and worn responsibly. Here’s why safety should always be your top priority:
1. FDA Regulation Matters
In the United States, all contact lenses—prescription or non-prescription—are considered medical devices and regulated by the FDA. This means they must meet specific safety standards to be legally sold. If you purchase safe non prescription colored contacts from an unregulated source, such as a costume shop or online retailer that doesn’t require a prescription, the lenses may be unsafe. They could be made from inferior materials or coated with harmful dyes that can irritate your eyes.
2. Risk of Infection and Damage
Improperly fitted lenses, including non-prescription colored contacts, can cause a range of problems, such as:
Scratches on the cornea
Decreased oxygen supply to the eye
Eye infections, which, in severe cases, can lead to vision loss
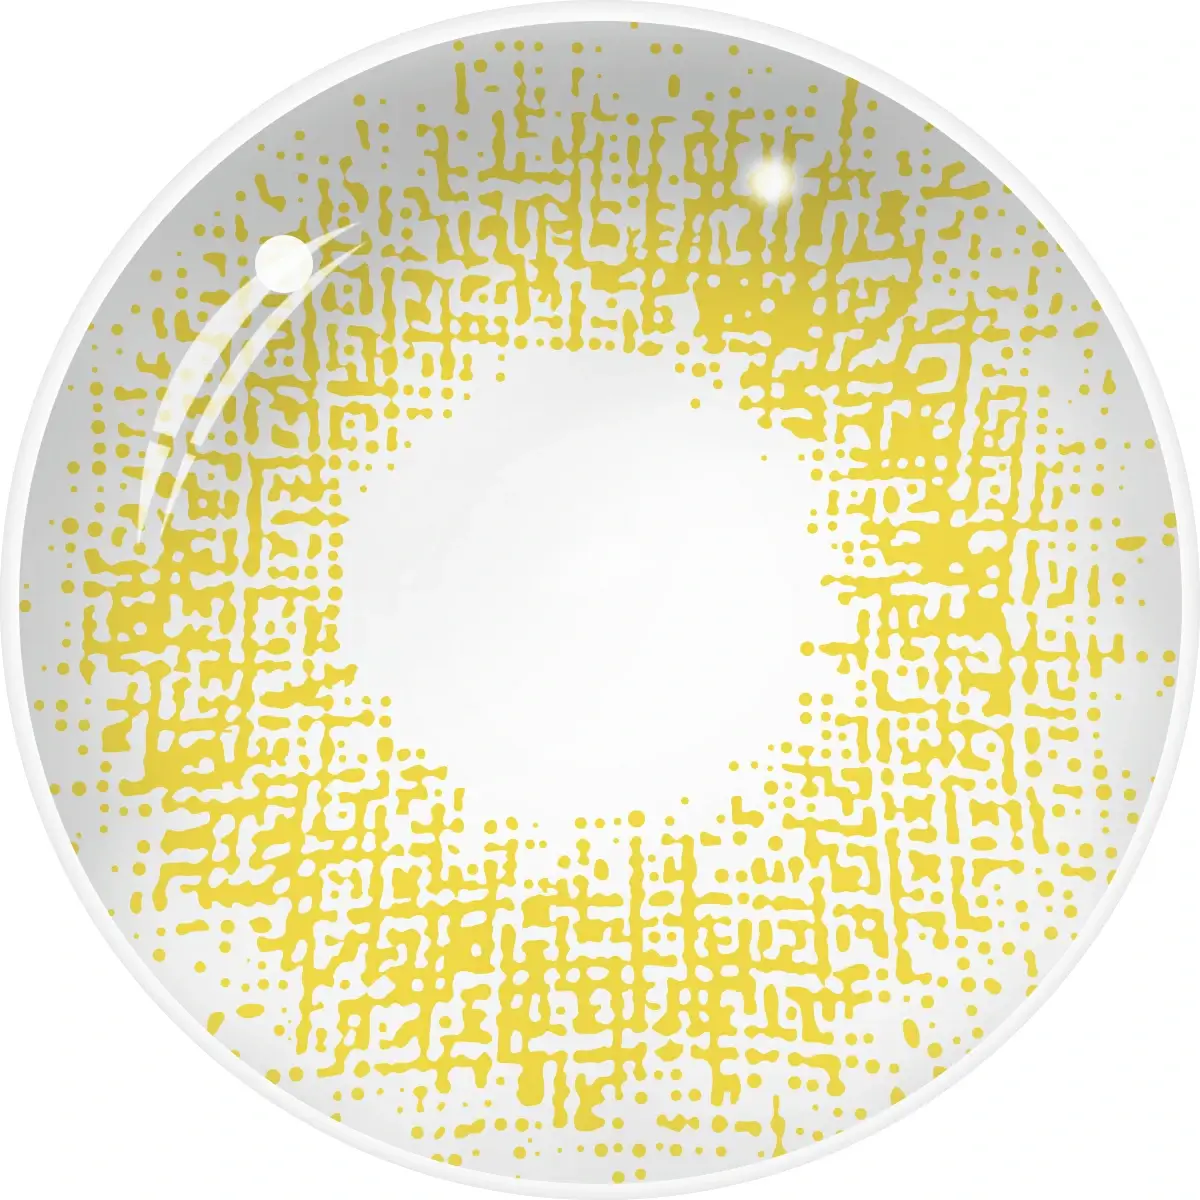
Always ensure the lenses you purchase are the correct size for your eyes. Many colored contacts, including 14.0 diameter contact lenses, are designed to fit most eyes, but an eye doctor should confirm if they are suitable for your specific needs.
3. Proper Care is Crucial
Even if your non-prescription colored lenses are FDA-approved, improper handling can lead to serious eye issues. You must clean and store them correctly, just as you would with prescription lenses. Neglecting hygiene can result in infections like keratitis, which causes redness, pain, and blurred vision.
What to Look for When Buying Colored Contacts
When shopping for colored contacts, especially non-prescription lenses, keep the following tips in mind:
1. Choose FDA-Approved Brands
Always purchase lenses from reputable retailers that sell FDA-approved products. Some brands now offer colored lenses in both prescription and non-prescription forms, including options like colored multifocal contact lenses or multifocal contacts colored, which are great for people needing vision correction but still wanting a pop of color.
2. Get a Fitting from an Eye Doctor
Even if you don’t need corrective lenses, an eye doctor can measure your eyes and recommend the best lens size and type for you. For example, lenses with a 14.0 diameter are common, but they may not suit everyone.
3. Avoid One-Size-Fits-All Lenses
Many cheap, non-prescription colored contacts are marketed as “one-size-fits-all,” which can be dangerous. Your eyes are unique, and ill-fitting lenses can lead to discomfort or even permanent damage.
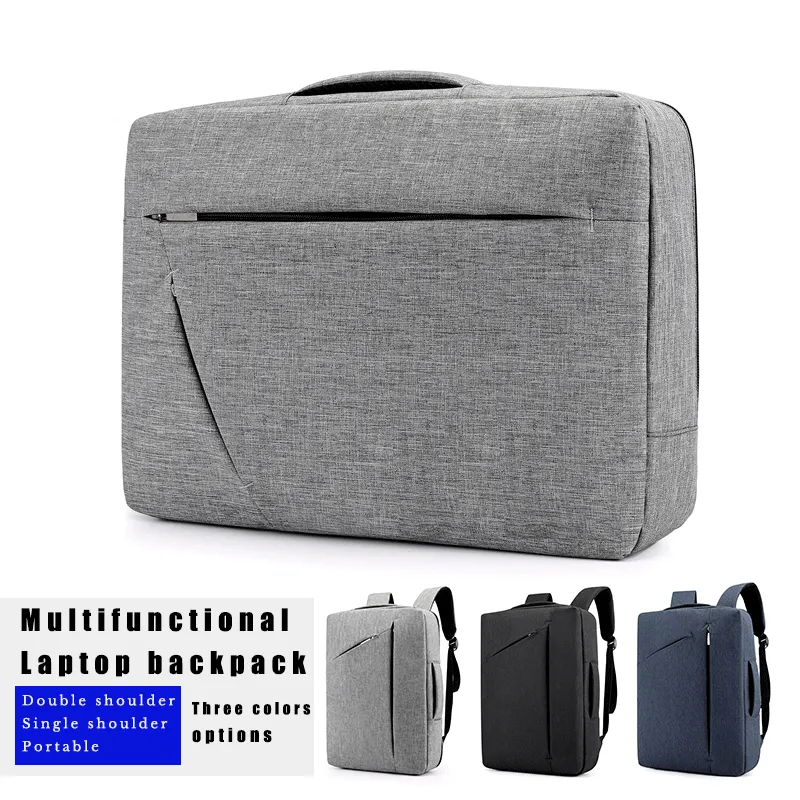
Yes, 78% of U.S. high school students carry school backpacks to lunch. They protect valuables and streamline transitions between classes. FEESLY BAG’s durable school backpack designs solve lunchtime challenges while supporting campus life.
Insulated front pocket keeps meals cool for 3 hours
Tech Safety:
Suspended laptop sleeve protects devices from drops
Multi-Activity Readiness:
Detachable gym/shoe compartment
FEESLY’s Manufacturing Advantage
Since 1984, we solve school procurement challenges: Bulk Order Speed
Produce 50,000+ school backpacks monthly 14-Day Custom Samples
Add school logos/colors faster than competitors 200K Ready Stock
Modify existing designs in 48 hours 40-Year Durability Guarantee
Reinforced stress points withstand 50lb loads
Backpack Lunch Checklist
Problem
FEESLY Solution
Theft risk
Slash-proof straps + lock loops
Food odor retention
Machine-washable compartments
Crowded spaces
Slim 16″ profile + corner guards
Upgrade Campus Life in 3 Steps
① Design Online:
Use FEESLY’s 3D builder → Select colors/features
② Get Samples:
Receive custom prototypes in 14 days
③ Order Bulk:
Email [email protected] for school district discounts
https://artistogel.top/wp-content/uploads/2020/03/logo2.png00adminhttps://artistogel.top/wp-content/uploads/2020/03/logo2.pngadmin2025-06-17 11:31:202025-06-17 11:31:20Do High School Students Take Their Backpacks to Lunch?


.jpg?x-oss-process=style/common)